Reserve the booth
Available booth cards route exhibitors into the reservation form for that booth.
Start with a free Core map, set up the event structure, let Mapboot build the interactive floor plan, then open booths for reservations, extras, and invoice-driven organizer processing.
Start with a new Core map in the dashboard. From there, add the main building or show area as a group, then add the floor or layer that will receive the uploaded floor plan.
The uploaded floor plan is the reference Mapboot uses to understand the show layout, booth rows, aisle structure, entrances, and important circulation paths.
It does not need to be perfect before you start. The key is connecting the right file to the right group, floor, or layer so the map buildout has a clean source of truth.
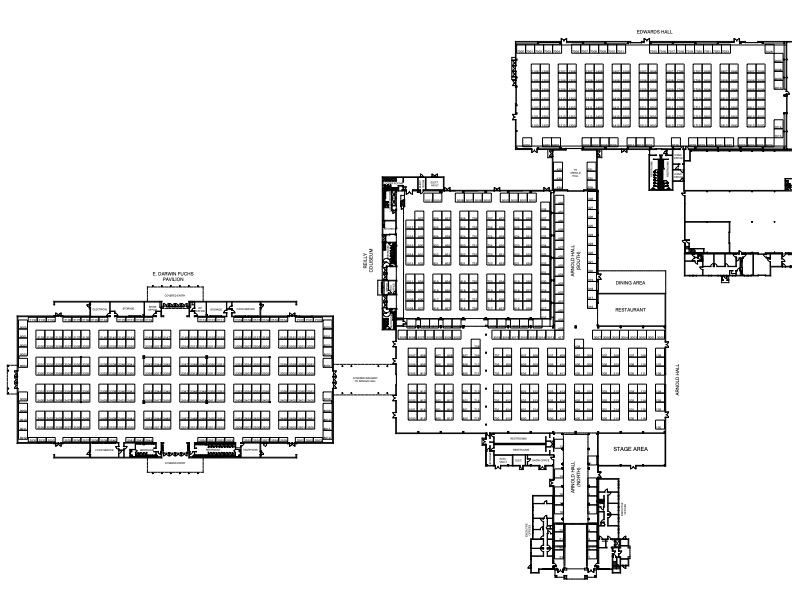
This viewer uses map m04a8392 as an example. The booths are already built into the map and can become reservable once booth prices, sizes, and status values are configured.
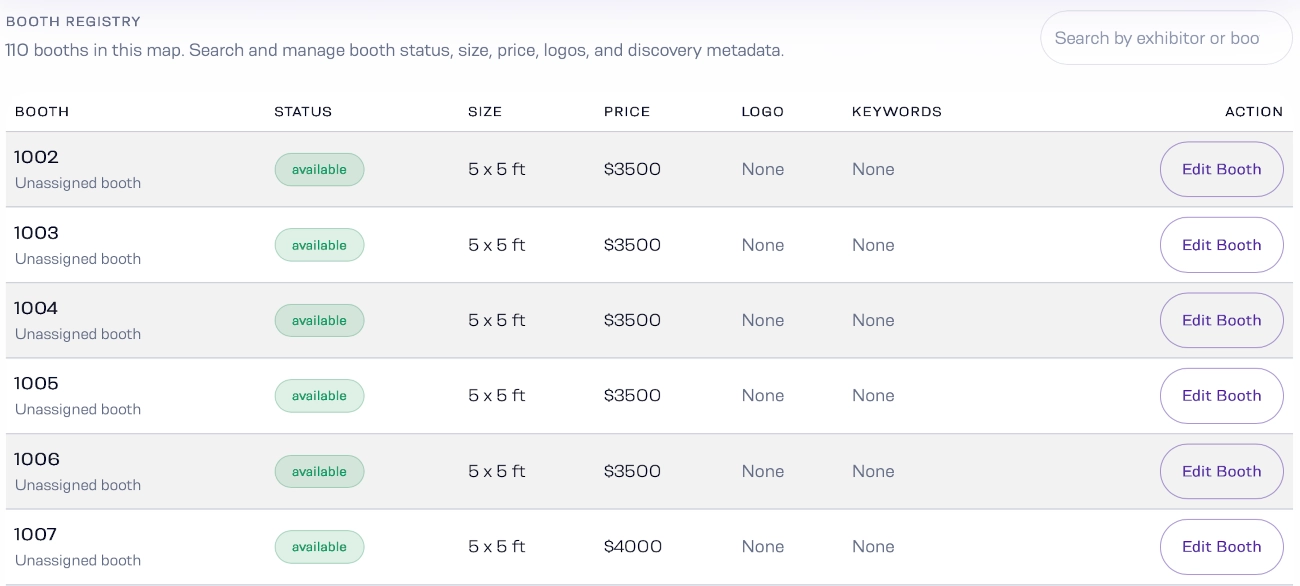
Once the Mapboot team creates the interactive map, the booth surfaces are connected back to the dashboard and start appearing as available booth locations.
From there, organizers can set booth sizes, prices, and status values. Available booths can be reserved directly from the live viewer.
The organizer can also define extras such as chairs, tables, floor tiles, Wi-Fi areas, or sponsorship promotion so exhibitors can add them to a reservation.
Once available booths exist in the dashboard, exhibitors can click Reserve on the booth card and create a reservation tied to their exhibitor account.
The reservation form captures contact information, website, logo, description, keywords, address details, booth extras, and the generated before-tax invoice.
The organizer can process the reservation, record received payment, place a booth on hold for partial payment, release it if payment does not arrive, or mark it sold when the booth is finalized.
Available booth cards route exhibitors into the reservation form for that booth.
Exhibitors can add organizer-defined extras such as chairs, tables, floor tiles, Wi-Fi areas, or promotion.
Exhibitors can log in later to edit the reservation, review selected extras, and download the invoice.