
In Part 1 we prepared floor plans and drew graphics. In Part 2 we built the routes network and added locations. Now for the final piece, wiring the floors together with vertical connections and publishing the live map.
The Final Piece: Vertical Connections
At this point, each floor has its own complete routes network and locations. But they're isolated, there's no way for the pathfinding engine to calculate a route from Floor 1 to Floor 3. Vertical connections are the last step that ties everything together.
Vertical connections are locations that transport visitors between floors: elevators, escalators, and stairs. In the Merchandise Mart project, we primarily dealt with elevators.
The Vertical Alignment Principle
As discussed in Part 1, elevators move on a vertical axis. This principle extends beyond just the floor plan images, it applies to access points as well.
The rule is simple:
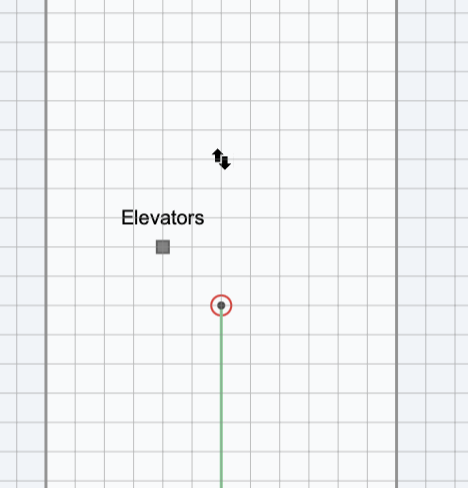
If an elevator on the ground floor has an access point at position (X: 50, Y: 30), the same elevator on every other floor must have its access point at the exact same position. The vertical connection gizmo draws from one floor's access point to the other's, so misaligned points result in diagonal lines that don't represent reality.
If an elevator has multiple access points, each corresponding point across floors must respect this same rule to keep the vertical connections lining up perfectly.
Aligning Access Points Across Floors
MapBoot provides a clever workflow for aligning points across multiple floors.
Viewing Multiple Floors
- Set the Sub Layer to Routes
- In the Map Tree (left panel), Ctrl+Click to select multiple floors
- The last selected floor becomes the editable layer
- All other selected floors appear as reference overlays
This reference view lets you see exactly where points sit relative to other floors, essential for precise alignment.
Achieving Perfect Alignment
With multiple floors visible:
- Identify the access points that need to align (e.g., elevator access points)
- On the editable floor, drag access points to match their counterparts on the reference floor
- Use Snap to help land points precisely
Take your time here. Accurate alignment ensures clean vertical connections and a professional result.
Creating the Logical Connection (Twinning)
Once access points are aligned, it's time to create the actual logical connections that the pathfinding engine uses.
Step-by-Step: Twinning Two Points
Let's say we need to connect Floor 1 Access Point A to Floor 2 Access Point B:
- Multi-select Floor 1 then Floor 2 in the Map Tree (Ctrl+Click)
- Since Floor 2 is the last selected, it's the editable layer
- Select Point B on Floor 2 (the one aligned with Point A)
- In the Properties panel (right side), find the Twins list
- Click Pick to enter twin selection mode
- Click Point A on Floor 1 in the viewport
- A dashed orange line and icon appear, confirming the connection
Automatic Bidirectional Connection

Twinning is bidirectional by default. When you add Point A as a twin of Point B:
- Point A automatically appears in Point B's twins list
- Point B automatically appears in Point A's twins list
- The pathfinding engine treats them as connected in both directions
You can verify this by selecting Floor 1 and clicking Point A, Point B will show in its twins list.
One-Way Travel
Sometimes you need a one-directional connection (e.g., a one-way escalator). To restrict travel from Point B to Point A only:
- Select Point A
- Remove Point B from Point A's twins list
Now visitors can travel from B to A, but not from A to B.
Handling Many Floors
With a building like the Merchandise Mart that has many floors, you might wonder: does every elevator need to connect to every other floor?
No. You only need to create connections between consecutive floors:
Floor 1 Elevator ↔ Floor 2 Elevator
Floor 2 Elevator ↔ Floor 3 Elevator
Floor 3 Elevator ↔ Floor 4 Elevator
The pathfinding engine is smart enough to chain these connections together. A route from Floor 1 to Floor 4 will automatically travel through Floor 2 and Floor 3 elevators.
Skipping Floors
What if an elevator doesn't stop at every floor? Simply skip it.
If Floor 1's elevator connects to Floor 3 but not Floor 2, create the connection directly from Floor 1 to Floor 3. The pathfinding engine will use whatever connections exist.
Applying to All Vertical Transport
The twinning process is identical for elevators, escalators, and stairs, there is no difference in how MapBoot handles them. The only thing that changes is the physical location of the access points on each floor.
Publishing Your Map
Save vs. Publish
An important distinction to keep in mind throughout the entire project:
- Save Stores your progress in the editor. Changes are not reflected on the live map.
- Publish Syncs your changes to the live map. This is what visitors see.
Save frequently as you work. Only publish when you're ready for changes to go live.
Going Live
- Click Save All to ensure everything is stored
- Click Publish in the toolbar
- Confirm the publish action
- Your map is now live
Embedding Your Map
Once published, getting your map onto your website takes just a few steps.
Getting Your Map ID
You can copy the Map ID from two places:
From the Editor:
- Select the Map name at the top of the Map Tree
- In the Properties panel, copy the Map ID
From the Dashboard:
- Find your map in the list
- Click the Copy Map ID button
Adding the Embed Code
Paste the MapBoot code snippet into your HTML and replace the placeholder Map ID with the one you just copied:
<div id="mapboot"></div>
<script type="module"
        src="https://cdn.mapboot.com/viewer/latest/mapboot.min.js"></script>
<script>
  MapBoot.init({
    mapId: 'YOUR_MAP_ID_HERE',
    container: '#mapboot'
  });
</script>
Save and refresh, your fully navigable indoor map of the Merchandise Mart is now embedded and ready for visitors to use.
A note on map sizing: The map automatically inherits the dimensions of its parent Across these three posts, we covered the full journey: Part 1 Floor Plans & Graphics Floor plan collection → Alignment verification → Scale calibration → Walls and surfaces Part 2 Routes & Locations Pathfinding network → Location markers → Surfaces and access points Part 3 Vertical Connections & Publishing Cross-floor alignment → Twinning → Publishing → Embedding Each step builds on the previous one, and the result is a complete, navigable indoor map that visitors can use to find their way through one of America's largest commercial buildings. This project was built using Mapboot, an indoor mapping platform for creating, embedding, and navigating multi-building indoor maps.
<!-- Example: full-width map with fixed height >
<div id="mapboot" style="width: 100%; height: 600px;"></div>
Looking Back: The Complete Workflow