
In Part 1, we covered collecting floor plans, verifying alignment, and drawing the graphics layer (walls and surfaces). Now we dive into the routing network and locations, the elements that make your map actually navigable.
Switching to the Routes Section
Everything we draw from this point forward belongs to the Routes section. This is a critical distinction:
- Graphics = Visual elements (walls, surfaces)
- Routes = Functional navigation (pathfinding network, locations)
To switch, set the Sub Layer to Routes in the editor.
Understanding the Routes Network
The routes network uses styleless lines, they have no visual styling because they're purely functional. These lines feed directly into MapBoot's cloud-based pathfinding engine, which calculates optimized routes from any start point to any destination.
Drawing Route Lines
Drawing routes is similar to drawing graphic lines, but the mindset is different. Instead of tracing architectural features, you're mapping logical paths that visitors actually take.
Key principles:
- Hallways are primary routes — These are the main arteries of movement
- Wide spaces need interpreted routes — In large open areas, imagine the optimized paths visitors typically walk
- Routes should connect all accessible areas — No isolated segments
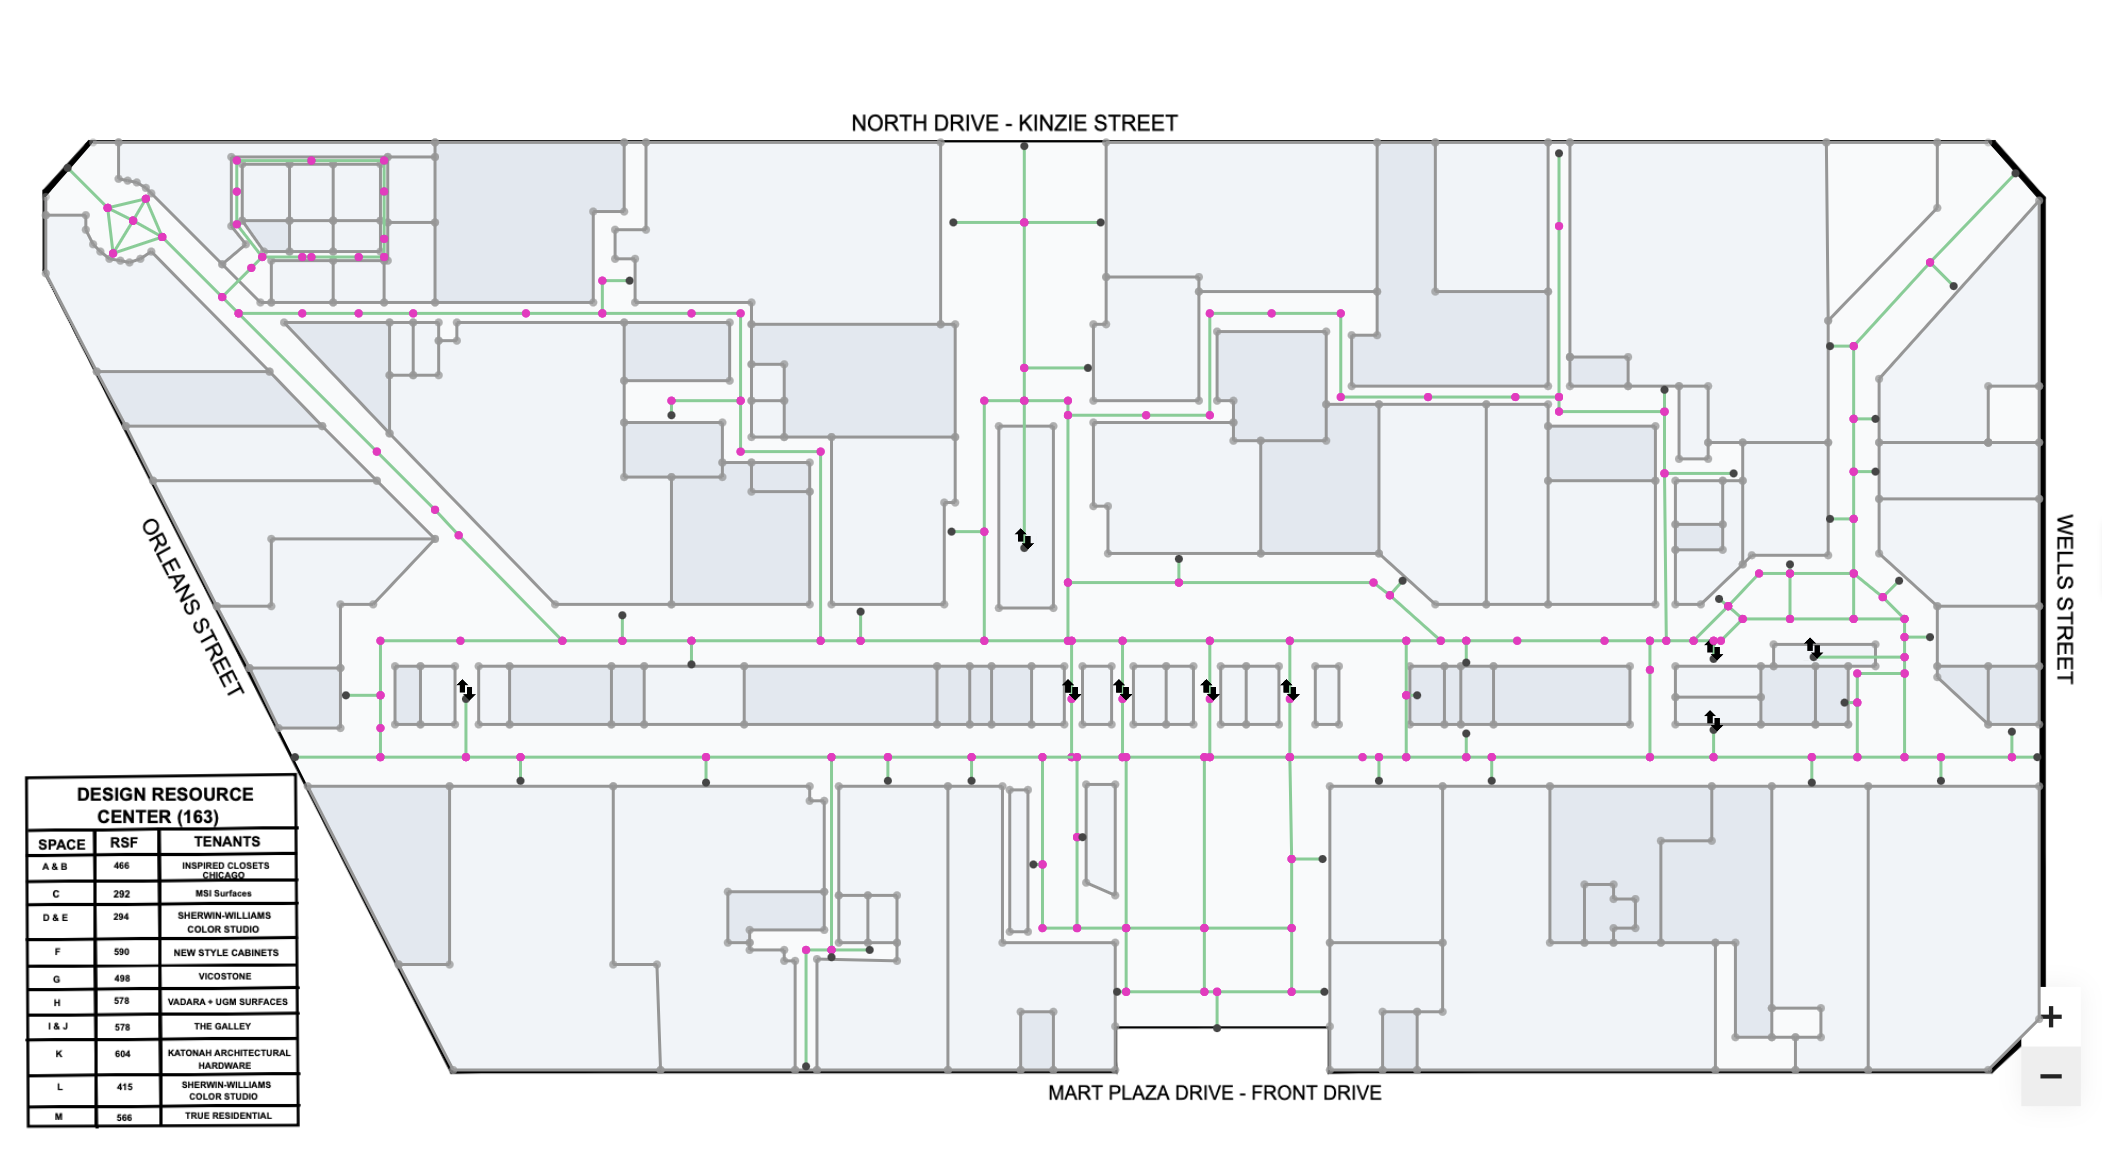
In our Merchandise Mart project, the green lines you see represent the complete routes network, a web of connected paths covering every navigable area of each floor.
Adding Locations
Locations are the destinations users search for and navigate to. Since they're pathfinding-related, they belong in the Routes section.
Creating a Location Point
To create a location:
- Make sure no element is selected
- Click the Add Point button (+)
- Click where you want the location marker
- Press Esc immediately
This creates an orphan point, a point not connected to any lines. MapBoot automatically converts orphan points into location markers. You'll notice it has a distinctive gizmo that sets it apart from regular route points.
Location Point Behavior
The location point is movable and represents the display position of the location icon (if one is assigned). You can drag it to adjust where the label or icon appears on the map.
Configuring Location Details
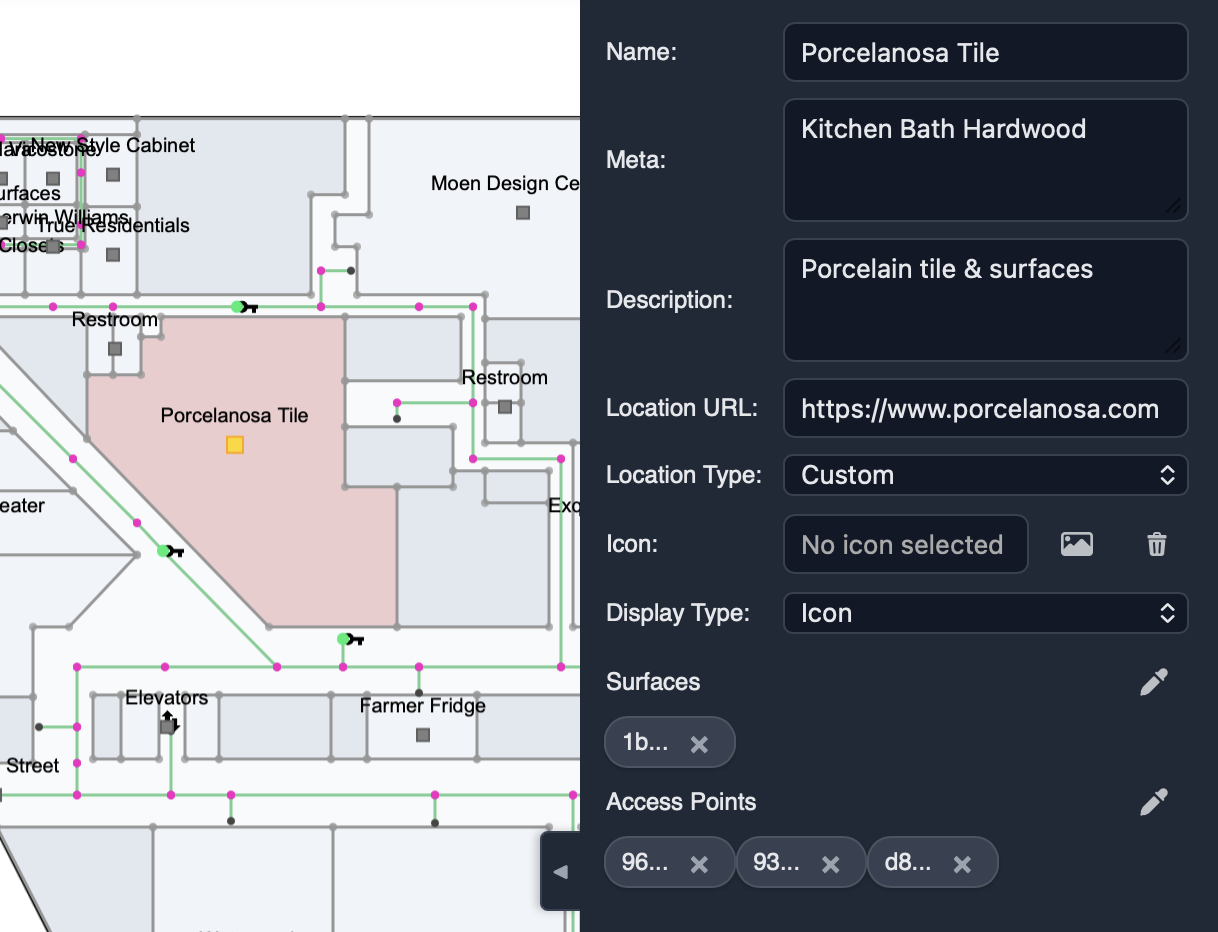
Select the orphan point to access its location settings in the Properties panel. Here you can set:
- Title — The searchable name users will find
- Description — Additional details shown when the location is selected
- Location URL — Custom icon for this location (if available)
- Meta — Keywords to improve search discoverability
Assigning Surfaces
The Surface property represents the area a location covers. When users search for this location, the assigned surfaces will highlight.
Surface assignment options:
| Scenario | Example |
|---|---|
| Single surface | A conference room (one polygon) |
| Multiple surfaces | Library science section (multiple shelf areas) |
Most locations have one surface, but some, like department store sections or library collections, logically span multiple polygons.
Setting Access Points (Required)
Access points are essential for a location to work. They define the entry points, essentially the "doors" that lead to the location.
A location can have:
- One access point — Single entrance (most common)
- Multiple access points — Multiple entrances (the pathfinding engine will choose the closest one)
Important: Access points are points that exist on the routes lines. Your routes network should be designed with access points in mind routes need to pass through or connect to these entry points.
The Missing Doors Challenge
In our Merchandise Mart project, we encountered a common real-world problem: the floor plans lacked door data.
Without marked doors, we couldn't simply trace doorway positions. Our solution was to improvise:
- Study each location on the floor plan
- Identify the most logical entry points
- Imagine where doors would realistically be placed
- Use those positions as access points
This approach required some interpretation, but by thinking like a visitor approaching each space, we identified sensible access points that work well for navigation.
Route Design Considerations
When designing your routes network, keep access points in mind from the start:
✅ Routes should pass near location entrances — Access points must connect to the network
✅ Plan for multiple entrances — Large spaces often have several logical entry points
✅ Think like a visitor — Where would someone naturally walk to reach this location?
✅ Connect access points to main corridors — Ensure smooth pathfinding from any starting point
Summary: Routes Section Workflow
- Switch to Routes sub-layer
- Draw the pathfinding network — Styleless lines following logical walking paths
- Create locations — Orphan points that become searchable destinations
- Configure each location — Title, description, surfaces
- Set access points — Connect locations to the routes network via entry points
What's Next
In Part 3, we'll cover:
- Creating transitions between floors (elevators and stairs)
- Twinning points for vertical navigation
- Testing the complete multi-floor routing
- Publishing and embedding the final map
This project was built using Mapboot, an indoor mapping platform for creating, embedding, and navigating multi-building indoor maps.