
Creating an indoor navigation map for a large commercial building like the Merchandise Mart in Chicago presents unique challenges. In this post, I'll walk you through our process of building a complete indoor map using MapBoot, from collecting floor plans to creating a fully navigable multi-floor map.
The Challenge
The Merchandise Mart is one of the largest commercial buildings in the world. With multiple floors and complex interior layouts, creating an accurate indoor map requires careful attention to detail and a systematic approach.
Step 1: Collecting and Preparing Floor Plans
Sourcing the Floor Plans
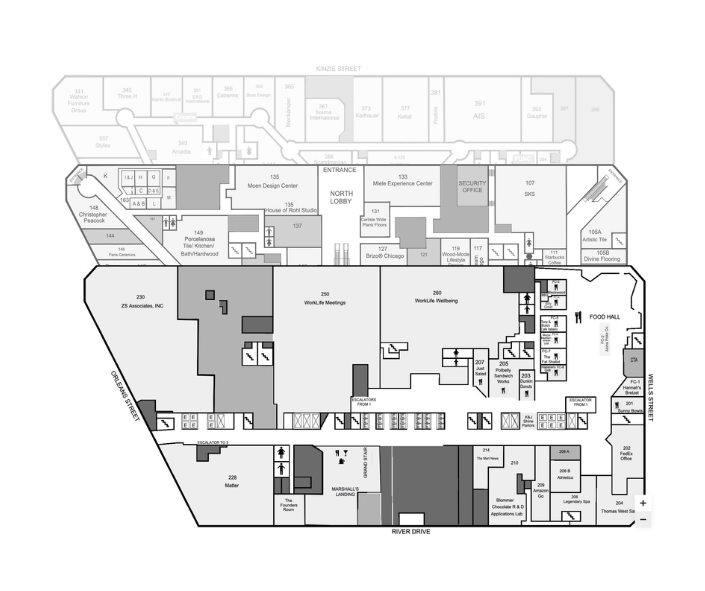
We collected floor plans from the official Merchandise Mart website. These plans were designed for general navigation purposes rather than technical architectural use—an important distinction that would affect our workflow later.
Verifying Floor Plan Alignment
Before importing floor plans into MapBoot, we needed to ensure they would overlay perfectly. This verification process is critical for multi-floor buildings where vertical elements like elevators and stairs must align across floors.
Our alignment verification process:
- Open all floor plans in a single drawing project (photoshop or gimp)
- Select the ground floor as the reference layer
- Compare each floor against the reference, one by one
Key Alignment Features
We used two main features to verify proper floor alignment:
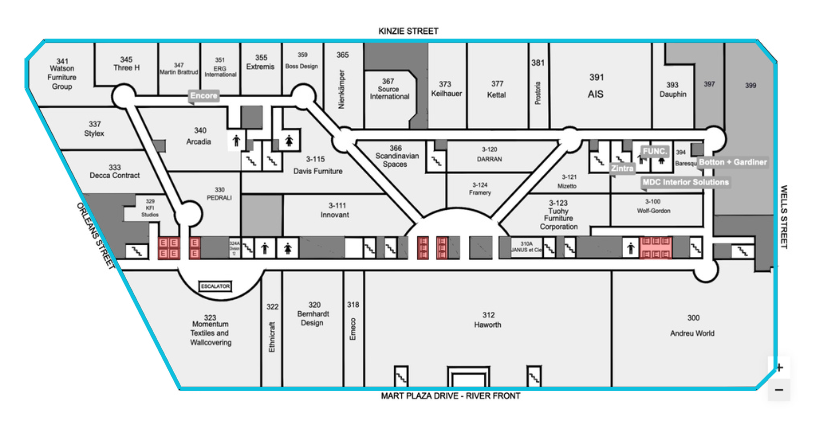
Exterior Walls (Blue shaded lines)The primary alignment check. External building walls should overlap perfectly across all floors since the building footprint remains consistent.
Vertical Transportation Elements (Red shaded surfaces) Elevators, escalators, and stairs must maintain the same XY position across floors, they move vertically, so their floor position should never shift.
The Elevator Challenge
Here's where we encountered an interesting problem. Even after ensuring the exterior walls overlapped correctly, we noticed the elevators were shifting position on some floors.
The reason? These floor plans weren't technical architectural drawings, they were navigation-oriented maps where precise measurements weren't the priority. This meant some interior elements weren't positioned with perfect accuracy.
Two Options for Fixing Alignment
We faced a choice:
- Fix elevators in external drawing software before importing to MapBoot
- Make corrections inside MapBoot Editor after import
We chose Option 2, making adjustments within the MapBoot Editor. This approach proved easier and more flexible, allowing us to fine-tune positions while seeing the actual map context.
Exporting Individual Floor Images
Once alignment verification was complete in our drawing software, we saved each floor as a separate image file ready for import into MapBoot.
Step 2: Setting Up the MapBoot Project
Project Configuration
Inside the MapBoot Editor, we set up our project structure:
- Select the Map at the top of the Map Tree (left panel)
- Name the map appropriately in the Properties panel
- Add floor layers for each level of the building
- Assign floor plan images to each layer
Getting the Scale Right
One critical step before drawing: establishing the correct world scale.
Since we already verified floor plan alignment, we only needed to calibrate the scale once, on the ground floor. The same scale would apply to all floors.
How scaling works:
- By default, one grid square equals 1 meter (if using meters) or 1 foot (if using feet)
- Find something on the floor plan with a known real-world measurement (a door, hallway, or standard feature)
- Adjust the floor plan scale until the feature matches its real-world size using the grid
- Example: If a hallway is 5 meters wide, it should span exactly 5 grid squares
Step 3: Drawing the Map
I divide floor work into two main sections: Graphics and Routes. Starting with Graphics is the most logical approach.
Graphics Section: Walls and Surfaces
The graphics work is straightforward once you understand the workflow.
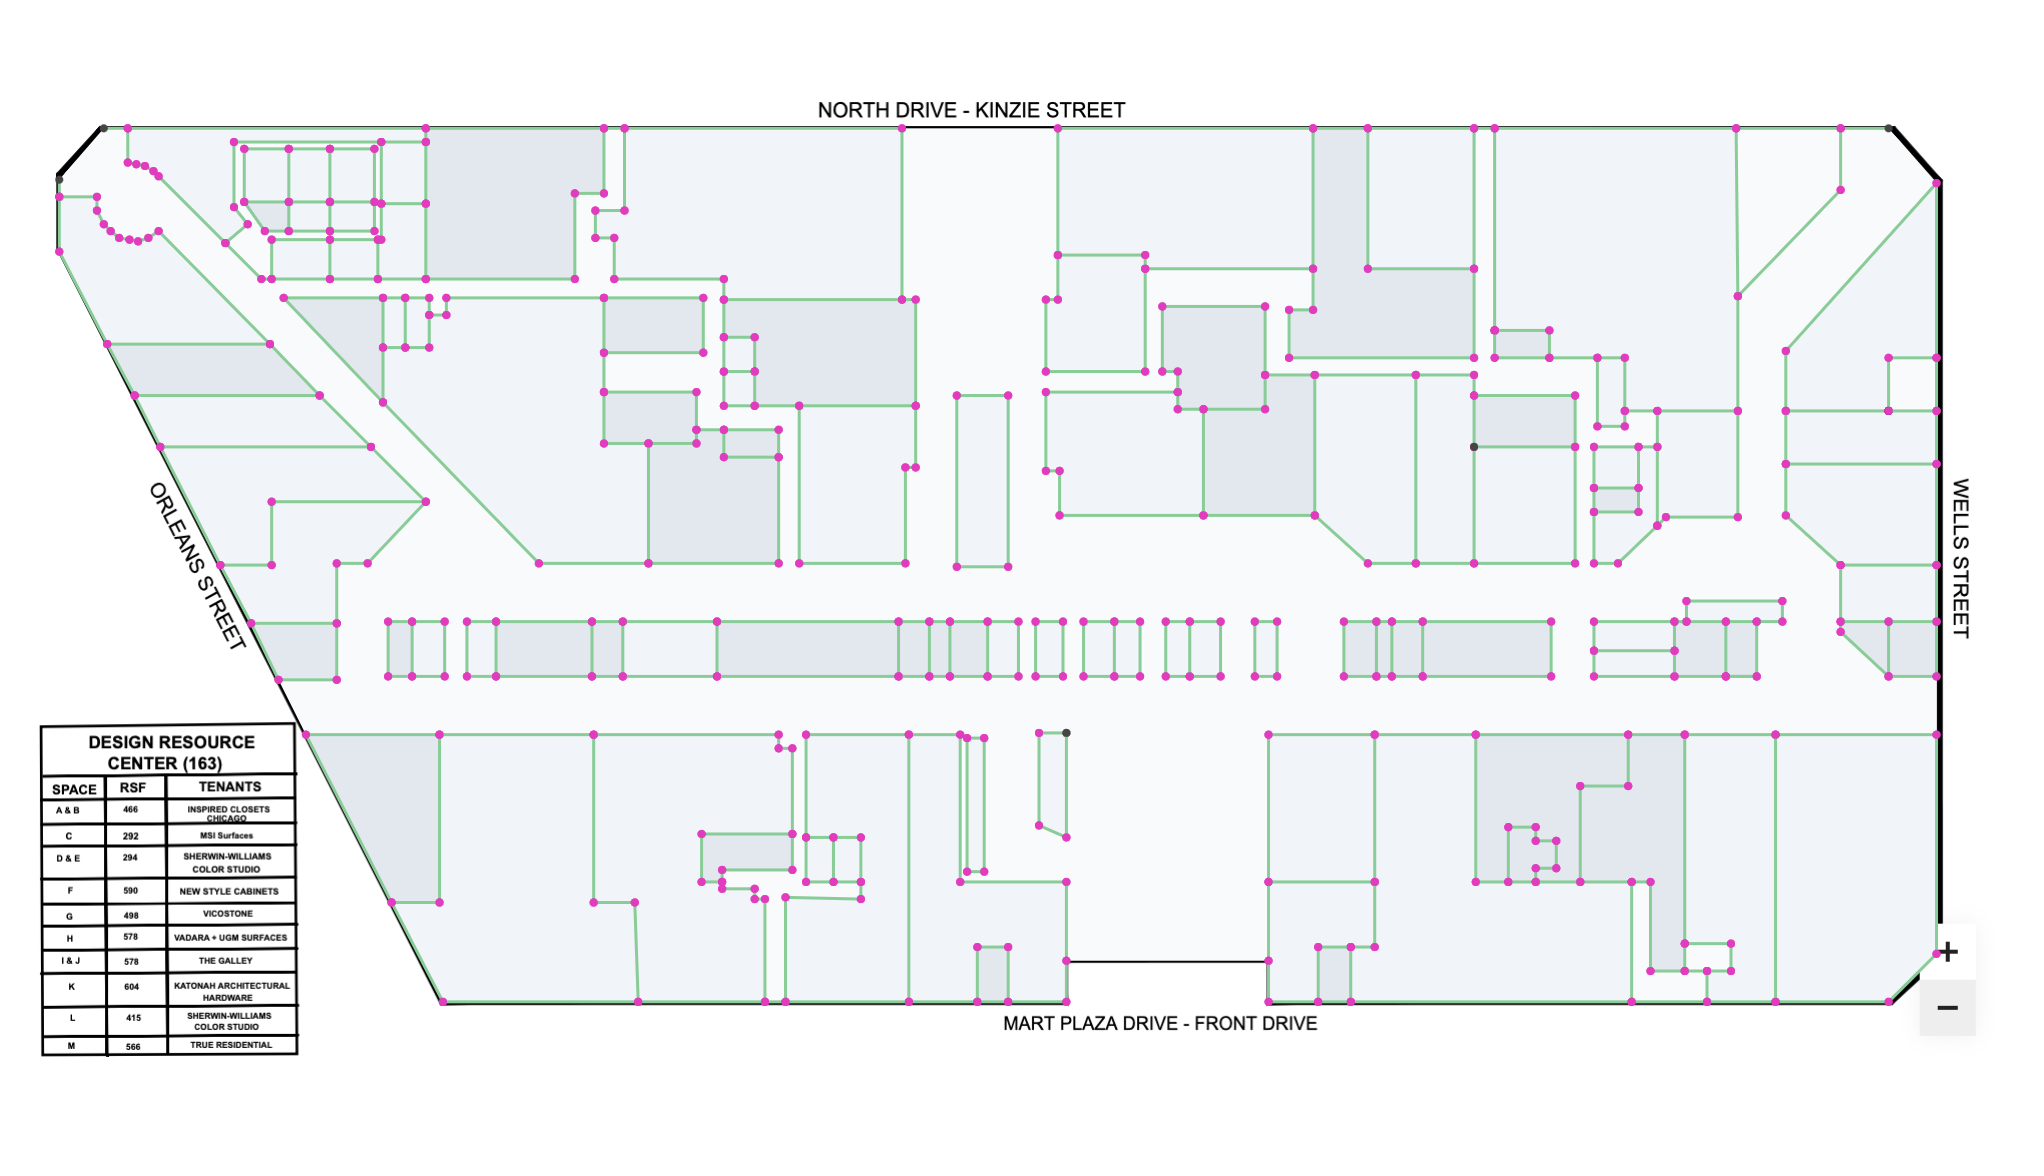
Drawing Walls
Using Add Point button (+), I trace all walls on the floor plan:
- Set Sub Layer to Graphics
- Click Add Point (+) to start drawing
- Trace wall segments following the floor plan
- Press Esc to finish each line
![]()
Wall Styles
MapBoot uses a simple but powerful styling system:
| Style | Use Case |
|---|---|
| Thick | Exterior/perimeter walls |
| Thin | Interior partition walls |
To apply styles:
- Select wall lines (use group selection for efficiency)
- Choose the appropriate style from the toolbar (right side)
Creating Surfaces
Surfaces represent rooms and spaces. The styling system is equally simple:
| Style | Use Case |
|---|---|
| Base | Entire floor surface |
| Private | Restricted access areas |
| Public | Public access areas |
This limited palette is intentional, it's easy to read and powerful enough to convey all necessary information.
To create a surface:
- Select a closed loop of lines (walls forming an enclosed area)
- Assign a surface style from the toolbar
- The surface is created immediately
To edit surfaces: Switch to Polygon selection mode to select and modify existing surfaces.
Key Takeaways
Building the Merchandise Mart map taught us several valuable lessons:
-
Floor plan quality matters - Navigation-oriented plans may need adjustment for precise indoor mapping
-
Verify alignment early - Check floor overlap before importing to avoid problems later
-
Use vertical elements as references - Elevators and stairs are perfect alignment checkpoints
-
Simple styling is powerful - MapBoot's limited style options (Thick/Thin walls, Base/Private/Public surfaces) are intentionally simple but highly effective
-
Work systematically - Separating Graphics and Routes into distinct phases keeps the workflow organized
What's Next
In Part 2 of this series, we'll cover:
- Building the routing network for navigation
- Adding locations and access points
- Creating transitions between floors
- Testing and publishing the final map
Stay tuned!
This project was built using Mapboot, an indoor mapping platform for creating, embedding, and navigating multi-building indoor maps.